Showing posts with label Products. Show all posts

05 February, 2016

How To Use Thin Cuts

 
Springtime Wishes Thin Cuts, this was a fun card to make inspired by Pinterest.  Because my fussy cutting is not so good I love how easy it is to use these stamps & matching thin cuts, makes my crafting life easier when I can just use my big shot instead of scissors, although I also need my scissors.
The fundamentals paper packs make the card glossy, you get the same design on both sides but one side is glossy & the other is like a tone on tone, they give your projects a lift.

The Products I Used:
Paper Fundamentals Whimsy Z3127 
5 1/2" X 4 1/4" White Cards & Envelopes, Value Pack X254
Springtime Wishes Stamp set C1641
Springtime Wishes Thin Cuts Z3201
Indian Corn Blue Ink Pad.  (discontinued)  
Indian Corn Blue Card Stock  (discontinued) 
Topiary Ink Pad Z2155
Silver Shimmer Trim Z1799
Bling Gems Gold Assortment Z2023
Sure Cut Craft Paper Cutter Z1783 
E-Z Dots Adhesive Z3022 
3D Foam Tape Z1151 
Bone Folder Z1204
 
Watch this Tutorial video to see how easy it is to use these. 
Close To My Heart’s new Thin Cuts make die cutting fun and easy! Use your favorite die cut machine to produce detailed shapes, and then use the coordinating stamp set to add color.


Products Used in this Video:
Stuck on You Tin Cuts Z3200
Stuck on You Stamp Set C1643
Chocolate Exclusive Ink Stamp Pad Z2111
Fern Exclusive Inks Stamp Pad Z2650
White Daisy Cardstock 1385
Big Shot Machine

If you would like information about anything you see or would like to place an order or even become a consultant & join my team - please don't hesitate to send me a message at mtlamont52@gmail.com, I will be happy to help you in any way I can or purchase directly from my Online Shop & have it delivered right to your door.    I also offer scrapbooking, card making, base & bling & papercrafting classes......contact me to find out more.                                        
  

09 January, 2016

Texturizing Techniques


Learn some new techniques to spice up your scrapbooking pages and cards. Jill shows you how to do fun things like embossing the non-traditional way, dynamic journaling, and plastic sponging.

Products Used: Versamark Ink Pad Z891,   Ranger Princess Gold Embossing Powder Z2066,   Honeycomb Embossing Folder Z1995,   Watercolour Paints Z3132,   Paint Brush Set Z3188,   Smoothie Exclusive Inks Stamp Pad Z2196 & My Acrylix Spritz Cleaner 1778.

If you would like information about anything you see or would like to place an order or even become a consultant & join my team - please don't hesitate to send me a message at mtlamont52@gmail.com, I will be happy to help you in any way I can or purchase directly from my Online Shop & have it delivered right to your door.    I also offer scrapbooking, card making, base & bling & papercrafting classes......contact me to find out more.

08 January, 2016

Collection Connection: Sangria

                                              
This little Thank You card is fun to make & show off all the papers that come in the Sangria Kit.    I just loved how quick & easy this card was to make using just a sample of the Sangria B&T, the mini Thank You stamp. Coral shimmer trim & some coloured twine.
The earthy tones and bright colors of the Sangria collection make it perfect for any season.
The video above shows all the different ways you can use this beautiful workshop kit using the papers, embellishments & some stamping, you can't go wrong.  This kit can be used for so many different occasions.

Products Used:  Sangria Paper Packet X7199B,   Sangria Complements X7199C,   Sangria Assortment Z3084,   Pink Enamel Gems Z3091,    Designed Decor Shadow Box Z2015,   My Acrylix Friend Tree D1677,   My Acrylix For Family C1633,   Cricut Artistry Collection Z3167,   Cricut Artfully Sent Collection Z3168,   My Acrylix Inked Alphabet E1033,    My Acrylix Jennifer's Hand B1484,   Coral Shimmer Trim Z3088,   Poppy Thick Twine Z3094 & Fern Thick Twine Z3093.

If you would like information about anything you see or would like to place an order or even become a consultant & join my team - please don't hesitate to send me a message at mtlamont52@gmail.com, I will be happy to help you in any way I can or purchase directly from my Online Shop & have it delivered right to your door.    I also offer scrapbooking, card making, base & bling & papercrafting classes......contact me to find out more.

05 January, 2016

Embossing Folders and Diffusers 101

                                      
Have you wanted to know how to use Diffusers with your embossing folders, then let Carly from CTMH show you how you can take your artwork to a whole new level.  

Products Used:   Confetti Embossing Folder Z3118,  Confetti Stars Embossing Folder Z3119,   Woodgrain Embossing Folder Z1996,   Arrow Embossing Folder Z1993,   Circle Diffuser Z3096,   Square Diffuser Z3097,   Poppy Exclusive Inks Stamp Pad Z2652,   Round Sponge Z697 & Spray Pen Z1380.

If you would like information about anything you see or would like to place an order or even become a consultant & join my team - please don't hesitate to send me a message at mtlamont52@gmail.com, I will be happy to help you in any way I can or purchase directly from my Online Shop & have it delivered right to your door.    I also offer scrapbooking, card making, base & bling & papercrafting classes......contact me to find out more.

04 January, 2016

Just Because Card


Using our prismatic Kaleidoscope Collection, Jill shows you how to create a card to give to someone special in your life. You’ll learn how to emboss a phrase, and then use watercolors over your stamped phrase. Measurements are shown at the end of the video.

Products Used:    Kaleidoscope Paper Packet X7202B,   Kaleidoscope Complements X7202C,   Kaleidoscope Assortment Z3085,   Enamel & Glitter Duos Purple Hearts Z3124,   Silver Foil Tape Z3130,   Diamonds are Forever Stamp Set C1629,   Glacier Exclusive Inks Stamp Pad Z2641,   Adhesive Z3022  & 3-D Foam Tape Z1151.

If you would like information about anything you see or would like to place an order or even become a consultant & join my team - please don't hesitate to send me a message at mtlamont52@gmail.com, I will be happy to help you in any way I can or purchase directly from my Online Shop & have it delivered right to your door.    I also offer scrapbooking, card making, base & bling & papercrafting classes......contact me to find out more.

03 January, 2016

Brush Calligraphy With Watercolor


Let Jill from Close To My Heart show you how to combine the expressive medium of watercolor with the elegant form of calligraphy.                

Products used in this video:    Watercolour Paints Z3132,  Paintbrush Set Z3188,  Watercolour Paper Z3146 & White Daisy Cardstock 1385.

If you would like information about anything you see or would like to place an order or even become a consultant & join my team - please don't hesitate to send me a message at mtlamont52@gmail.com, I will be happy to help you in any way I can or purchase directly from my Online Shop & have it delivered right to your door.    I also offer scrapbooking, card making, base & bling & papercrafting classes......contact me to find out more.

08 December, 2015

Owl Twisted Easel Card


I love the colour purple & I'm growing to like little owls.  I thought this little guy was cute & my craft girls wanted to learn to do a twisted easel card so I decided to make them up as a kit for them.

I cut a 11"x 8.5" as the base card then scored it at 5.5" & again on the diagonal on the left 5.5" square.  I used 4 of the Close To My Heart Cricut cartridges for the Owl, Fancy Square, Branch & the Happy Birthday.  In the Cricut Design Space I laid them all out & cut the whole thing on my Cricut Explore.  I'm learning the software so if I can cut it all out (including the base etc.) then that's more practice for me.  The little Owl was all cut & then paper pieced together & I used 3d foam to build him up a bit & again for the Sentiment so it is then used as a stop for the card when opened.  I had alot of fun doing this card, I wanted to do one with just cut files & no stamping, I inked around the Owl to make him stand out a bit more & inked over the little butterfly & finished him off with some bling, I had to get that in somewhere, I just love to put bling on everything.

The products I used:


Close to My Heart Artiste Cricut Cartridge Z3170.
Close to My Heart Artistry Cricut Cartridge Z3167.
Close to My Heart Art Philosophy Cricut Cartridge Z3171.
Close to My Heart Artbooking Cricut Cartridge Z3169.
Kaleidoscope Paper Packet X7202B.
Gypsy Cardstock X5757.
White Daisy Cardstock 1385.
Kraft Cardstock Z1375.
Topiary Cardstock X5635.
Black Cardstock 1386.
Plus I used alot of leftover scraps.
Eggplant Exclusive Inks Stamp Pad Z2647.
Gypsy Exclusive Inks Stamp Pad Z2190.


If you would like information about anything you see or would like to place an order or even become a consultant & join my team - please don't hesitate to send me a message at mtlamont52@gmail.com, I will be happy to help you in any way I can or purchase directly from my Online Shop & have it delivered right to your door.    I also offer scrapbooking, card making, base & bling & papercrafting classes......contact me to find out more.

02 December, 2015

Last Orders!

Last Chance to order from the Holiday Expressions Catalogue

 December is the last month you can buy before this catalogue is retired for good, so don't miss out on ordering your favourite papers, stamps & embellishments.


If you would like information about anything you see or would like to place an order or even become a consultant & join my team - please don't hesitate to send me a message at mtlamont52@gmail.com, I will be happy to help you in any way I can or purchase directly from my Online Shop & have it delivered right to your door.    I also offer scrapbooking, card making, base & bling & papercrafting classes......contact me to find out more.
06 March, 2015

A Game of Hopscotch

 There's only one month left to play with Hopscotch before recess is over! https://blogctmh.files.wordpress.com/2015/02/unknown-13.jpeg
You’re just a hop, skip, and a jump away from a playful creative awakening when you get your hands on our fun Hopscotch Background and Texture (B&T) papers. Using the Hopscotch papers is more than child’s play—it’s carefree crafting at its finest.
There are hundreds of ways to transform the hopping hexagons, sprightly sunbursts, and other popping patterns on these papers into works of art. So what’s your game plan?
One of our favorite ways to use the playful papers is with the Workshops on the Go® Hopscotch scrapbooking kit!

If you’ve used our Workshops on the Go® kits before then you’re already acquainted with the joy that comes from piecing together a gorgeous, complete scrapbook layout or collection of beautiful cards. These kits give you everything you need to complete some of the loveliest pieces on the block—wherever and whenever you wish. The only things we don’t pack into our kits are the three things you provide: your trusty paper trimmer, your adhesive of choice, and your creativity.
We don’t like to play favorites, but if we did, the spunky Hopscotch scrapbook kit from Seasonal Expressions 1 would definitely be one of them. You can’t help but love its energetic papers and eye-catching patterns—and the stamp set scores a lot of points for positivity and sheer cute factor!

https://blogctmh.files.wordpress.com/2015/02/hopscotch-stamp-set.jpeg                                                                           
So who’s in? There’s only one month left to get this goodie before it’s gone forever, so get yours from your Consultant before March is over and this game of Hopscotch includes.                          

27 January, 2015

Choosing Paper Over Pixels: Why We Still Scrapbook


http://1.gravatar.com/avatar/0b2622dfcce2280320b46901e861b4fe


Originally posted on Make It from Your Heart: January 23, 2015
 
With the end of the old year and the dawn of the new year, I’m sure you’ve seen your fair share of “Year in Review” posts floating through your Facebook newsfeeds. Some people argue that things such as this have replaced scrapbooking layouts and albums. This is the new scrapbooking, they say. We no longer turn pages; we scroll them. So why then do some of us continue to use paper to preserve our memories? Is scrapbooking with paper still important? Well, let me tell what I think.
The things that pop up in our newsfeeds often become irrelevant within mere hours of being born. Their permanence is as fleeting as dust in the wind. People will click through maybe once or twice, but after that, few will even remember they were there. When we upload pictures to Facebook, it fails to leave us with the same sense of satisfaction that comes from the whiz of a paper cutter or the stickiness of fingers spotted with adhesives. And when we type out our words, we lose the intimacy of handwriting and the beautiful way a personality dances its way through the shapes of the letters.
This is why I love National Papercrafting Month. It’s a wonderful reminder at the beginning of the year of why I fell in love with scrapbooking in the first place. It reminds me why we still spend time preserving memories with paper in a world that is slowly turning into pixels.
Working with paper will ground you in reality and in the beautiful subtleties of our physical world, which is why I think the Year >> Noted kit is so nicely suited to this month. In the rush of a new year and the memory of an old year, it not only keeps me grounded, but also gives me a place to tether my dreams, making my big goals seem so much more in reach!
Life is a continual cycling of beginnings and endings—don’t get lost in the whirlpool. Take the time to write down those things within your heart that will one day become the whispers of your past. Ground yourself in paper. Because when you hold a real, finished project in your hands, the rush and the hurry fades away and the only thing you feel is contentment.
And trust me, when this new year becomes old and the time comes to reflect, you’ll be happy you have something real to hold and to remember. Let this kit become a time capsule filled with little pieces of who you are in this moment. I promise you that when you take the time to remember, your heart will fill with gratitude for not only who you are, but also for who you are becoming.
Happy scrapbooking!
from Jeanette Lynton

26 January, 2015

Cricut Artfully Sent: Pop-up Cards with Icons


Another card from the Artfully Sent cartridge, I was inspired by another card on Patricia Manhire's blog, she is a very talented consultant from New Zealand.   I just had to make it, the cage & insert layer are found on page 13 of the Artfully Sent cartridge, I just love birdcages & flowers so this was fun to do.
The cage is cut from a colour in the Paper Fundamentals Whimsy Assortment pack, the flowers from the It's the Little Things stamp set are stamped tone on tone & colour on white, they are cut out individually & placed on top of each other some with 3-D foam tape so I could layer them.  Inks I used are Canary, Pixie, Gypsy, Topiary (this is my favourite colour to use for leaves) & Glacier.  For some added texture I embossed the Glacier insert with the Woodgrain Embossing folder.  For the finishing touches I use Durables Artisan Studs on the feet of the cage & for some extra bling I used the Bling Gems Gold assortment & Bitty Sparkels on the flowers.


Take a look at some eye-popping cards made with the Pop-up and Icon functions of Close To My Heart’s Cricut® Artfully Sent collection.                           

22 January, 2015

Christmas Tea Lite Card

I got the idea of this card at one of our consultant crop days last year I think, but can't remember who was the clever girl that made up a sample.
I thought it would look good as a Christmas Card.  I cut a piece of Colonial White cardstock 5.5" x 12" & scored at 3" & 6" folding both as mountain folds to form the base of your card.  I cut out a 2.5" circle in the top, then cut a a larger circle in vellum,  I used Whisper & then shadowed the White Daisy exclusive inks for the sentiment from the Merriest Christmas Stamp set.
I cut a 6" x 5.5" piece of B&T paper out from the Yuletide WOTG Kit for the base section, the Poinsettias are cut from the Cricut Artiste Cartridge - page 73 in various sizes to make the leaves & flowers.  I used Cranberry & Topiary cardstock, stamp random patterns all over the flowers, wet them, crunched them up & when dry shaped the flowers & glued together with Liquid Glass (my favourite thing to use).  The Reindeer is cut from the Cricut Artbooking cartridge in Black cardstock.  You can decorate rest of card as you wish with bling, I used the gold shimmer trim as a border & the Bling Gems Gold assortment on the flowers with a little red gem for his nose.
And of course finish off with the tea lite candle behind the vellum.  I was happy with how it turned out.

If you would like information about anything you see or would like to place an order or even become a consultant & join my team - please don't hesitate to send me a message at mtlamont52@gmail.com, I will be happy to help you in any way I can or purchase directly from my online shop & have it delivered right to your door.    I also offer scrapbooking, card making, base & bling & papercrafting classes......contact me to find out more.

21 January, 2015

Cricut® Artfully Sent: The Basics

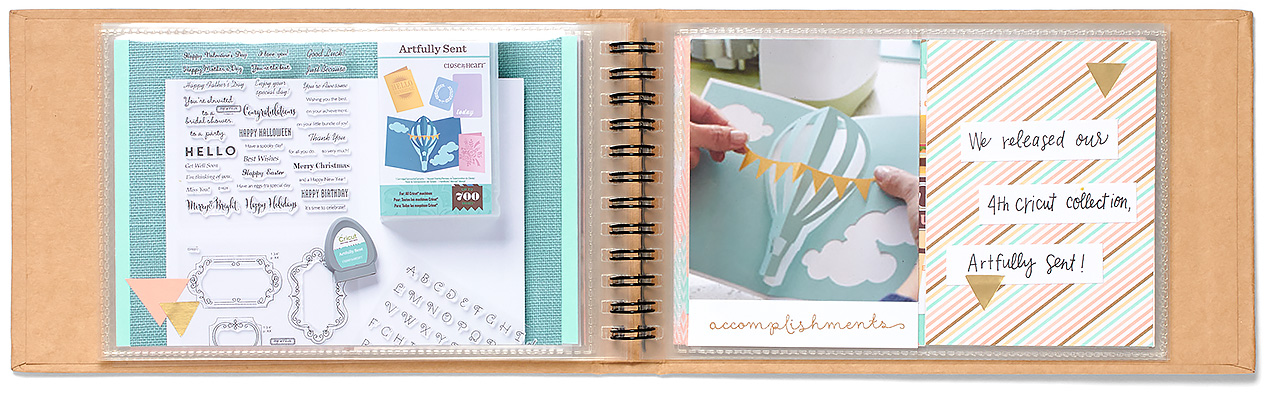
 Learn to use Close To My Heart’s Cricut Artfully Sent Cartridge.  Pop on over to my online shop & take a look at this & many other handy tools to make your crafting life easier.


I haven't had the chance to play with the new Artfully Sent Cricut cartridge yet as much as I want to but I did manage to make 2 cards after being inspired by another crafty consultant Patricia Manhire.  There are so many ideas on Pinterest & other crafty blogs & websites to get motivated. This card is found on page 47 of the booklet & cut at the recommended sizing.  I used Glacier cardstock for the base of the card, White Daisy Cardstock for the insert.  I used Santa Claus C1567, Always Grateful C1559 & Merry & Bright (retired) stamp sets.  I'm still trying to master the sponging effect but am getting there, I used Glacier, Indian Corn Blue & Pacifica & Pixie ink pads for the backgrounds, Ponderosa Pine for the trees & Chocolate for Santa & Sleigh. To get the illusion of mountains I got a white piece of cardstock & ripped it into shapes I wanted & used them as a mask for stamping.  I used glitter under the snowflake cutout but CTMH Glitter sheets would look beautiful as well for that bit a bling that's needed.

I have finished off the card with a sentiment on the front & some White Enamel Stars.


My take on the card that was featured in the tutorial for using the All Purpose Mat & mixing inks together.  The Deer & Rabbit can be found on page on page 12 & the background on page 5 of the booklet.  I cut off some of the tree trunks & changed the sentiment.  
Go to the post dated 6th November 2014 to see original card.
Always add your own spin on cards & get inspired by everything & everyone.


  If you would like information about anything you see or would like to place an order or even become a consultant & join my team - please don't hesitate to send me a message at mtlamont52@gmail.com, I will be happy to help you in any way I can or purchase directly from my online shop & have it delivered right to your door.    I also offer scrapbooking, card making, base & bling & papercrafting classes......contact me to find out more.
              

01 November, 2014

Washi Tape Christmas Bauble

Another quick & easy card to add to your stash is this
Christmas bauble using washi tape.  Washi tape is very forgiving & if you don't line it up the first time then you can carefully lift it up again & re stick it.  Our embossing folders are fantastic, they have deep impressions so there is no need to put them through the Cuttle Bug or Big Shot more than once.  I just love my Big Shot, it's such a sturdy machine & it gets alot of use.    I used a ShinHan marker to colour in the clear sparkles to match ink.    This card inspired by Sue-Ellen Robertson.                                                                                                                                       
The following products I have used are:-  White Card & Envelope Value Pack X254,   Chevron Embossing Folder Z1925, Gold Polka-Dot Washi Tape Z1920, Ruby Chevron Washi Tape Z1933,  Bronze Shimmer Trim Z1849, Santa Claus Stamp Set C1567, Silver Shimmer Trim Z1799, Cranberry Cardstock 1272, White Daisy Cardstock 1385, Sparkles Clear Assortment Z1752, Carmine ShinHan Touch Twin Marker Z2448 & Cranberry Exclusive Ink Pad Z2116.                                                                                                          
If you would like information about anything you see or would like to place an order or even become a consultant & join my team - please don't hesitate to send me a message at mtlamont52@gmail.com, I will be happy to help you in any way I can or purchase directly from my Online Shop & have it delivered right to your door.    I also offer scrapbooking, card making, base & bling & papercrafting classes......contact me to find out more.

30 October, 2014

Yuletide Carol & Snowhaven Cards

With Close To My Heart I belong to a very talented group of ladies from all over Australia.   We help each other, share ideas & give inspiration.   Inspired by Margaret Moroney. These were a hit with my workshop ladies who broke out & started using this pattern for birthday & other cards.


The papers used are from the Yuletide Carol X7187B & Snowhaven X7188B Paper Packs (you use 4 of the front & 4 from the back to make the pattern), these 2 packs are so versatile you could even use them or other projects other than Christmas, it's only your imagination.

Embellishments used were Bling Gems Gold Assortment Z2023, Gold Shimmer Trim Z1985, Ruby Cardstock X5927, White Daisy Card & Envelope X254, Colonial White Card & Envelope X1410, Desert Sand Cardstock 1273,  Desert Sand Ink Pad Z2118, Stripe Embossing Folder Z1960, Quatrefoil Embossing Folder Z1926, the Merry Christmas from Holiday Tags Stamp Set D1560, White Daisy Cardstock 1385 & Colonial White Cardstock 1388.

If you would like information about anything you see or would like to place an order or even become a consultant & join my team - please don't hesitate to send me a message at mtlamont52@gmail.com, I will be happy to help you in any way I can or purchase directly from my Online Shop & have it delivered right to your door.    I also offer scrapbooking, card making, base & bling & papercrafting classes......contact me to find out more.

10 September, 2014

Family is Forever


I used September's Stamp of the Month S1409 Family is Forever.
You can earn this exclusive stamp of the month in September when you place an order of $75 or more in Close To My Heart products with me or from my Online Shop.
This little stamp set has many possibilities for so many occasions.   Other CTMH products I used are new colours Pixie Z2644, Glacier Z2641 & Saddle Z2171 exclusive stamp pads, the new ShinHan touch twin markers Carmine Z2448, Mahogany Z2456 & Sap Green Z2463, Cardstock colours are Canary X5772, White Daisy 1385 & Lagoon X5762, Brushed paper pack X7190B, Teal Shimmer Trim Z1918.  The tree was stamped, cut & then coloured, the little hearts are part of the tree & just coloured Carmine & stuck down while the little dotted heart is from the retired For Always Stickease assortment.
The stamped hearts were cut on the cricut machine using the Artiste cartridge.

If you would like information about anything you see or would like to place an order or even become a consultant & join my team - please don't hesitate to send me a message at mtlamont52@gmail.com, I will be happy to help you in any way I can or purchase directly from my Online Shop & have it delivered right to your door.    I also offer scrapbooking, card making, base & bling & papercrafting classes......contact me to find out more.